
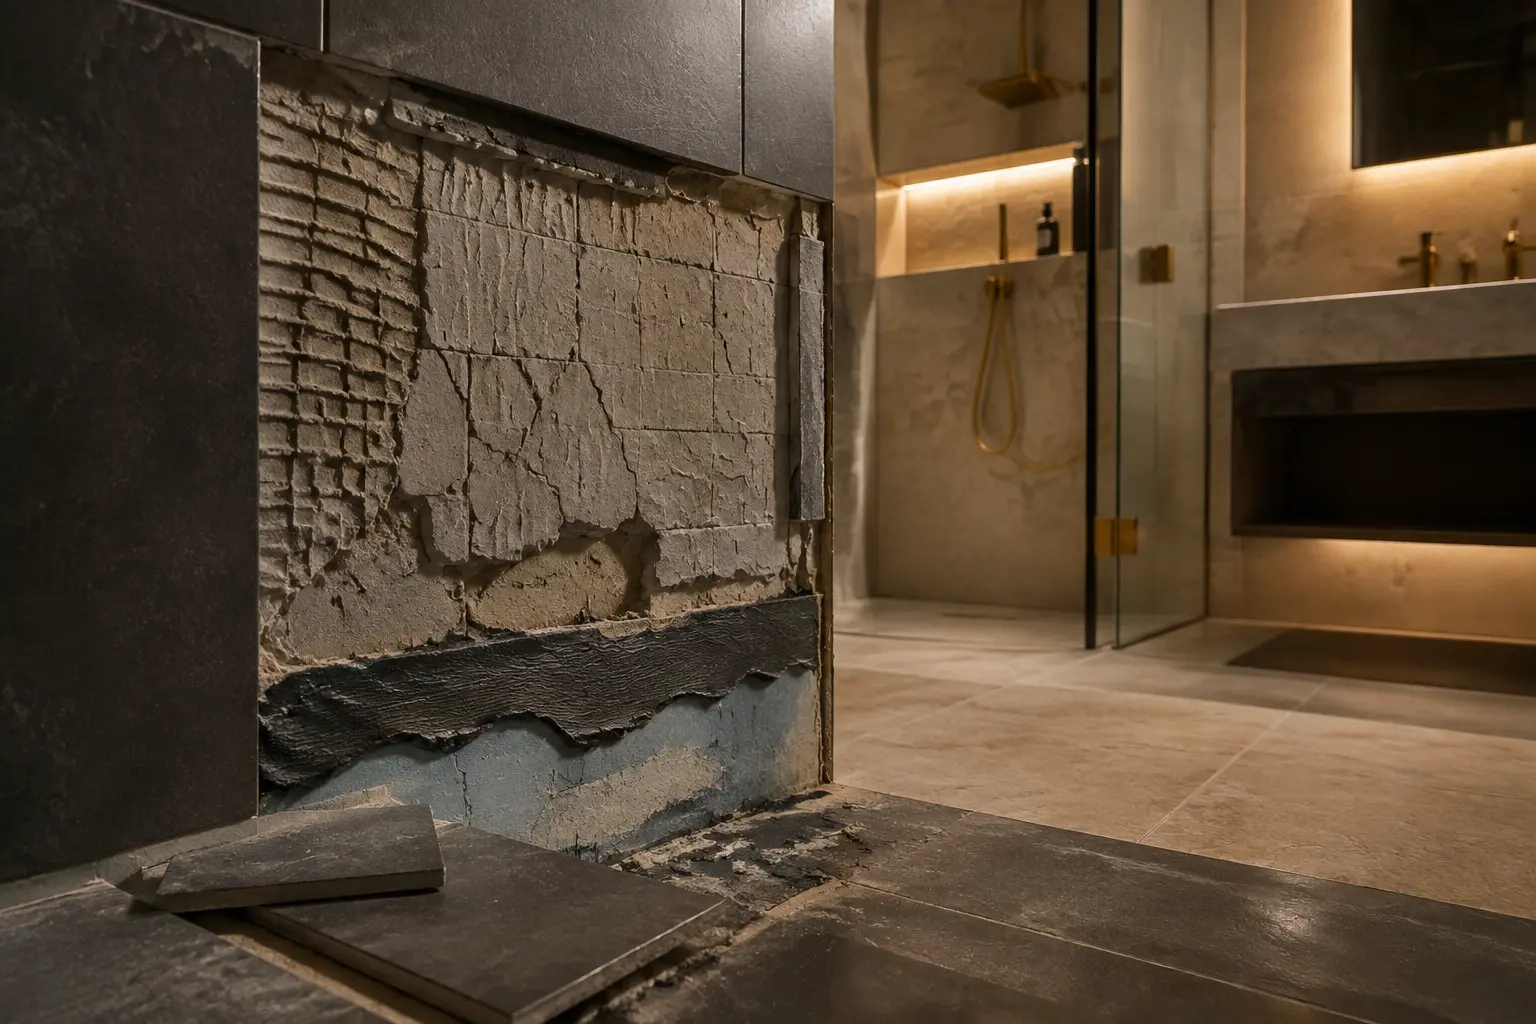
Some construction mistakes seem harmless while a building is new. The walls are freshly painted, the grout lines are clean, and the services are hidden. It is only after the first heavy rain, a summer heatwave, or a heating season that stains, unpleasant odours, cracks, and hollow-sounding floors begin to appear. By then, the contractor may no longer be on site, and finding the cause can mean opening up finishes that are already complete.
The good news is that many such problems can be prevented through systematic inspection. The key is not for the client to act as a site supervisor every day, but to know which work will no longer be accessible once the next stage begins. A photograph of the waterproofing before backfilling, or a screed moisture reading before the floor is laid, is often worth more than dozens of photographs of the finished interior.
In Istria, details face the added combination of sun, wind, salt in coastal areas, and short, intense downpours. A building in Rovinj, Poreč, Umag, or Buje should therefore be viewed as one complete system: water needs a clear route from roof to ground, the building envelope must remain continuous, and every penetration through it must be properly detailed. Here are ten common mistakes and the practical checks that can reveal them before they become costly repairs.
Mistakes 1 and 2: Discontinuous Waterproofing and Incorrect Falls
The first mistake is waterproofing that lacks continuity. The critical areas are not the centres of large surfaces, but wall-to-floor junctions, pipe penetrations, thresholds, corners, and transitions between different materials. If a corner tape is creased, a penetration lacks the correct collar, or the membrane is damaged before it is protected, water can find a path that remains invisible from the outside.
At foundations and below-ground sections, inspection must take place before the protective layer is installed and backfilling begins. Check that the substrate has been prepared, laps and terminations have been executed in accordance with the selected system, and the waterproofing is protected against mechanical damage. In bathrooms, on balconies, and on terraces, thresholds, drains, and edges deserve particular attention. Applying extra material at random is no substitute for a complete, coherent detail.
The second mistake is insufficient or incorrectly directed falls. Ponding on a terrace is more than an aesthetic issue: water places prolonged stress on grout lines, edges, and junctions. Falls should be checked before waterproofing, again before the finish is installed, and on the completed surface, because every layer can alter them. In particular, confirm that water runs towards the drain or outer edge rather than towards the door.
A simple test with a controlled amount of water can reveal ponding and the direction of drainage, but it should only be carried out once the materials are ready and in agreement with a qualified professional. The result must be considered alongside threshold levels and drainage capacity; a perfectly installed drain is of little use if the lowest point of the surface lies elsewhere.
- Request photographs of every corner, penetration, threshold, and drain before they are covered.
- Check falls with a straightedge or suitable measuring instrument, not by sight alone.
- Protect completed waterproofing from subsequent trades and site traffic.
Mistakes 3 and 4: Incomplete Roof Details and Poor Window Installation
The third mistake occurs when the main roof surface is sound but the flashings, penetrations, or edges have not been integrated into a reliable system. Water most often enters around chimneys, roof windows, ventilation pipes, valleys, and abutments with higher walls. The visible trace inside may appear far from the entry point because water can travel along the membrane, rafters, or slab.
Before the roof is closed up, photograph the membranes, laps, penetrations, and ventilation path. On the completed roof, inspect fixings, flashings, wall terminations, and the unobstructed route of water to the gutters. In the windy areas of western Istria, the fixing detail is not a secondary consideration: it must suit the design, the roof-covering system, and the site's actual exposure.
The fourth mistake is a window that has been fixed and foamed in place without a properly detailed junction to the opening. Installation foam can fill a gap, but on its own it does not provide long-term protection from external water, air leakage, and internal moisture. The lower corners, sill junction, roller-shutter box, and transition to the façade insulation are particularly vulnerable.
Inspection begins before the reveals are plastered and the sills installed. Check the frame position, mechanical fixings, continuity of the sealing layers, and the ability of the profile to drain. Once complete, it is useful to observe the junctions during rain and stronger winds. Edge condensation does not automatically prove a single defect, but it is a reason to assess ventilation, thermal bridging, and sealing as one system.
Roofs and windows rarely leak through the main surface; the point of failure is usually the transition between two systems.

Mistakes 5 and 6: Unrecorded Services and Unsealed Penetrations
The fifth mistake is closing up services without testing them or recording their routes. After move-in, installing a shelf or kitchen unit—or undertaking a future refurbishment—can strike a pipe or cable. A more serious problem arises when a plumbing joint leaks slowly inside a wall or a waste pipe lacks the correct flow, with the consequences emerging only later as an odour, dampness, or a blockage.
Before plastering and lining, photograph walls straight on, with visible reference points and a scale. The images should show service routes, joints, valves, boxes, and crossings, not merely an overview of the room. Services should be tested by the appropriate specialists in accordance with the design and professional standards; the client should request a written record of the results rather than rely on verbal confirmation.
The sixth mistake is a later penetration that cuts through waterproofing, the vapour-control layer, the façade system, or a fire-rated assembly, and is then closed with foam or silicone alone. This often occurs with air-conditioning units, exterior lighting, aerials, pergolas, and additional services that were not coordinated at the outset.
Every penetration requires a clear detail: an outward fall where applicable, a compatible seal, mechanical stability, and a finish that does not retain water. The best prevention is a coordinated penetration plan prepared before the building envelope is installed. If a position has to change, the alteration should be documented and inspected again before it is covered.
- Create a room-by-room services map and store it in two separate locations.
- Request written test records before systems are put into service.
- Record every later opening through the external envelope and check how it has been sealed.
Mistakes 7 and 8: Covering the Screed Too Soon and Leaving the Façade Plinth Vulnerable
The seventh mistake is laying parquet, vinyl, or another moisture-sensitive floor finish over a screed that is not sufficiently dry or stable for the selected system. The surface may appear dry while moisture remains deeper within it. The consequences include lifting finishes, gaps, unpleasant odours, discolouration, or adhesive failure. Judging by touch or by the number of elapsed days is not reliable.
Before installation, carry out the appropriate moisture measurement and record the location, date, and result. At the same time, inspect flatness, cracks, perimeter strips, and planned movement joints. Where underfloor heating is installed, the preparation and commissioning protocol must be coordinated with the design and the requirements of the screed, adhesive, and final floor finish. Rushing this stage can undermine the quality of an expensive floor.
The eighth mistake is concealed at the base of the façade. The plinth is exposed to rain splash, ground moisture, impact, and soil placed against it after the façade is complete. If the finish materials are unsuitable for this zone, the reinforcement layer is weak, or the junction with the waterproofing is discontinuous, the damage appears as blistering, peeling, dark patches, and cracks.
Ground, terrace, and paving levels should be coordinated before the plinth is finished. The final layer must not conceal drainage or ventilation details, and subsequent backfill should not cover any wall area that was not designed for ground contact. An inspection after landscaping is just as important as the inspection when the façade is completed.
The construction programme is not a measure of dryness. The decision to cover a floor should be based on measurements and the requirements of the selected system.
Mistakes 9 and 10: Thermal Bridges and Water Directed Back Towards the House
The ninth mistake is a break in the thermal envelope at balconies, lintels, slab edges, roller-shutter boxes, and roof-to-wall junctions. In winter, such a detail can produce a colder internal surface; in summer, it can admit more heat. The first visible sign may be no more than localised condensation or mould behind a wardrobe, leading the problem to be blamed solely on ventilation habits.
Inspection is most effective while the insulation remains visible. Check its continuity, its design thickness, how closely the boards fit, and the treatment of every edge and penetration. A thermographic survey can be useful under suitable temperature conditions, but the images require expert interpretation and must be related to the construction details. A colourful image is not, on its own, a diagnosis.
The tenth mistake is final ground grading that directs rainwater towards the building. A house may have well-executed waterproofing, but persistent standing water beside the wall increases the load on every weak point. Risk rises when downpipe outlets are too short, drains are blocked, or paths and planting beds are later installed above the planned level.
At handover, walk around the entire building, follow the ground falls, and establish where water from every gutter and drain ultimately discharges. Repeat the inspection after the first intense rainfall: puddles, soil erosion, and splash marks provide very clear evidence. In sloping gardens, pay particular attention to water arriving from higher ground and to the maintenance of drainage components where these have been designed.
- Follow the route of rainwater from the roof to a safe discharge point, with no improvised breaks along the way.
Inspection Hold Points Worth Adding to the Construction Plan
Inspection need not slow the site down when it is built into the programme. The contractor and site supervisor know in advance that a particular stage cannot be covered before inspection, allowing the timing to be coordinated with subsequent work. The greatest delays occur when a problem is discovered by chance after the next trade has already begun.
The first group of checks takes place before concreting, backfilling, and closing up the structure. The second comes before plastering, screeding, tiling, façade work, and internal linings. The third is functional: testing drainage, operating building services, opening windows and doors, and confirming access to service points. The final group concerns documentation and includes reconciling the completed work with the records handed over.
When you identify a deviation, record it precisely: location, date, photograph, expected condition, and agreed corrective action. A note such as ‘not right’ is difficult to track. It is far more useful, for example, to state that water is ponding beside the threshold of the north terrace and that the detail must be inspected again before the tiles are laid.
Once the repair is complete, inspect the corrected area and its junctions with the rest of the assembly. A new photograph should clearly show the rectification. This closes the inspection item and reduces the chance of the same defect recurring elsewhere on the building.
- Before backfilling: waterproofing, protection, penetrations, and planned drainage.
- Before closing walls: services, joints, testing, and photographs of routes.
- Before final finishes: moisture, flatness, falls, movement joints, and substrate preparation.
- Before the façade finish: insulation continuity, plinths, reveals, and fixing details.
- Before handover: functional tests, the defects list, and verification of corrective work.

Handover: How to Inspect More Than Paintwork and Grout Lines
Arrive at handover with a checklist of rooms and systems rather than relying on first impressions. Follow the same route through the building: outside, from the roof down to the ground, and then inside, room by room. Open windows and doors, run water at every outlet, check drainage, and note unusual sounds or smells. Functional testing of more complex systems should be entrusted to the appropriate specialists.
Minor cosmetic defects matter, but they should not displace questions that affect durability: where does the water go, can a valve be serviced, are penetrations sealed, are test records available, and have agreed changes been added to the documentation? A follow-up inspection after tools and protective coverings have been removed is also valuable.
Prepare a clear defects list with photographs and an agreed status for each item. Do not try to assign blame for every sign immediately; first distinguish the symptom from its cause. A damp patch may originate from the roof, a service, or condensation, so remedial work without diagnosis often merely moves the problem.
A thorough handover is not an expression of mistrust but the final stage of quality management. When inspection hold points have been managed throughout construction, the final review confirms what has been built rather than searching for what has already been concealed.
At the final inspection, record the symptom and its location. The cause is confirmed through inspection, measurement, and documentation—not guesswork.

Conclusion
A sound decision is made before the first day on site.
The ten mistakes described here share a common pattern: they arise at a junction, penetration, or transition and become expensive once the next stage conceals them. Good construction is therefore about more than selecting quality materials. Substrate preparation, system compatibility, correct detailing, and inspection at the right moment are equally important.
For a project in Rovinj, Poreč, Umag, Buje, or elsewhere in Istria, prepare an inspection plan before work begins. Agree on photographs of concealed layers, the required measurements, and a method for recording corrective work. This approach cannot promise a building with no defects at all, but it gives you a far better chance of identifying a problem while it remains accessible, understandable, and reasonably straightforward to correct.
Send your project for reviewFrequently asked questions
Answers to have before construction begins.
Which construction mistakes are most often discovered only after move-in?+
Discontinuous waterproofing, incorrect falls, roof and façade penetrations, insufficiently dry screed, thermal bridges, and service joints concealed within walls often become apparent late. What they share is that the finishing layer temporarily hides them, making inspection before closing up far more effective than relying on the finished appearance.
Can a client carry out site inspections independently?+
The client can maintain photographic records, track agreed inspection points, and ask specific questions. Technical decisions, measurements, and confirmation of compliance with the design should be undertaken by authorised or suitably qualified professionals according to their role on the project. A sound system combines professional supervision with well-organised client records.
What should be photographed before plastering and closing up walls?+
Photograph all service routes, joints, valves, distribution boxes, penetrations, and any reinforcement. Capture each entire wall square-on, followed by details with a scale and a reference point such as the edge of an opening. Label photographs by room and date so they remain genuinely useful later.
Is a crack in a new house always a sign of a serious defect?+
Not every crack is equally significant. Its position, width, direction, time of appearance, and any change over time all help with assessment. Record the crack and, if it widens, recurs, or is accompanied by dampness or deformation, request a professional inspection. Painting over it before identifying the cause can conceal valuable evidence.
Which documents are worth keeping after construction is complete?+
Keep the contractual and as-built documents supplied to you, test records, photographs of concealed works, technical data sheets for important systems, operating and maintenance instructions, and a list of the equipment actually installed. Organise the records by system so that maintenance teams or future renovation work can quickly find the information they need.